Publishing your first LinkedIn post with Taplio
Understand the basics of the post-composer.
The post-composer is probably the most important feature of Taplio. After all, what good is finding inspiration if you can’t actually publish?
So we’ve made the composer extremely accessible from any page in the app. You can either open the sidebar menu and click on the “write a post” button:
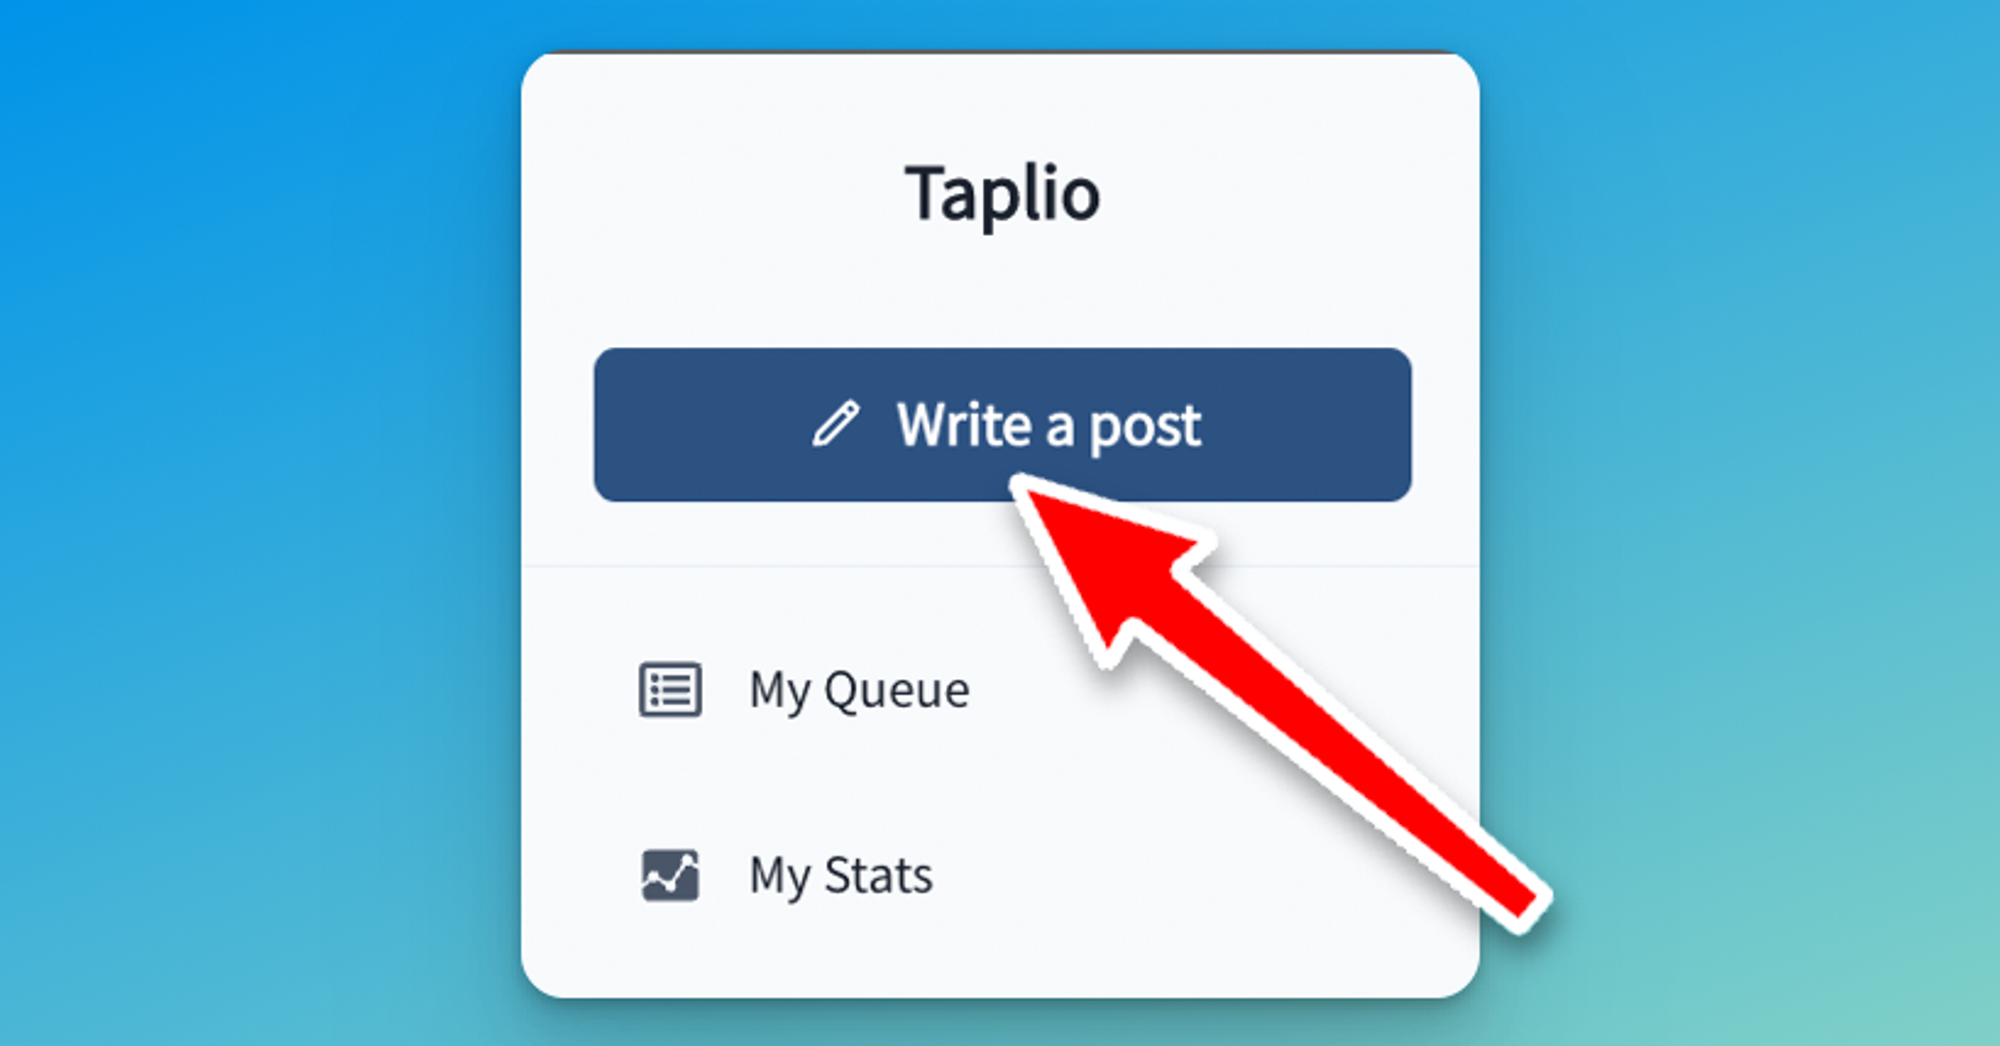
Or simply find this button at the bottom-right of any page in the app, which will also open the composer.

Whenever you click on one of those buttons, this will open up the composer as a side component on the right of your screen (if you’re on your laptop).
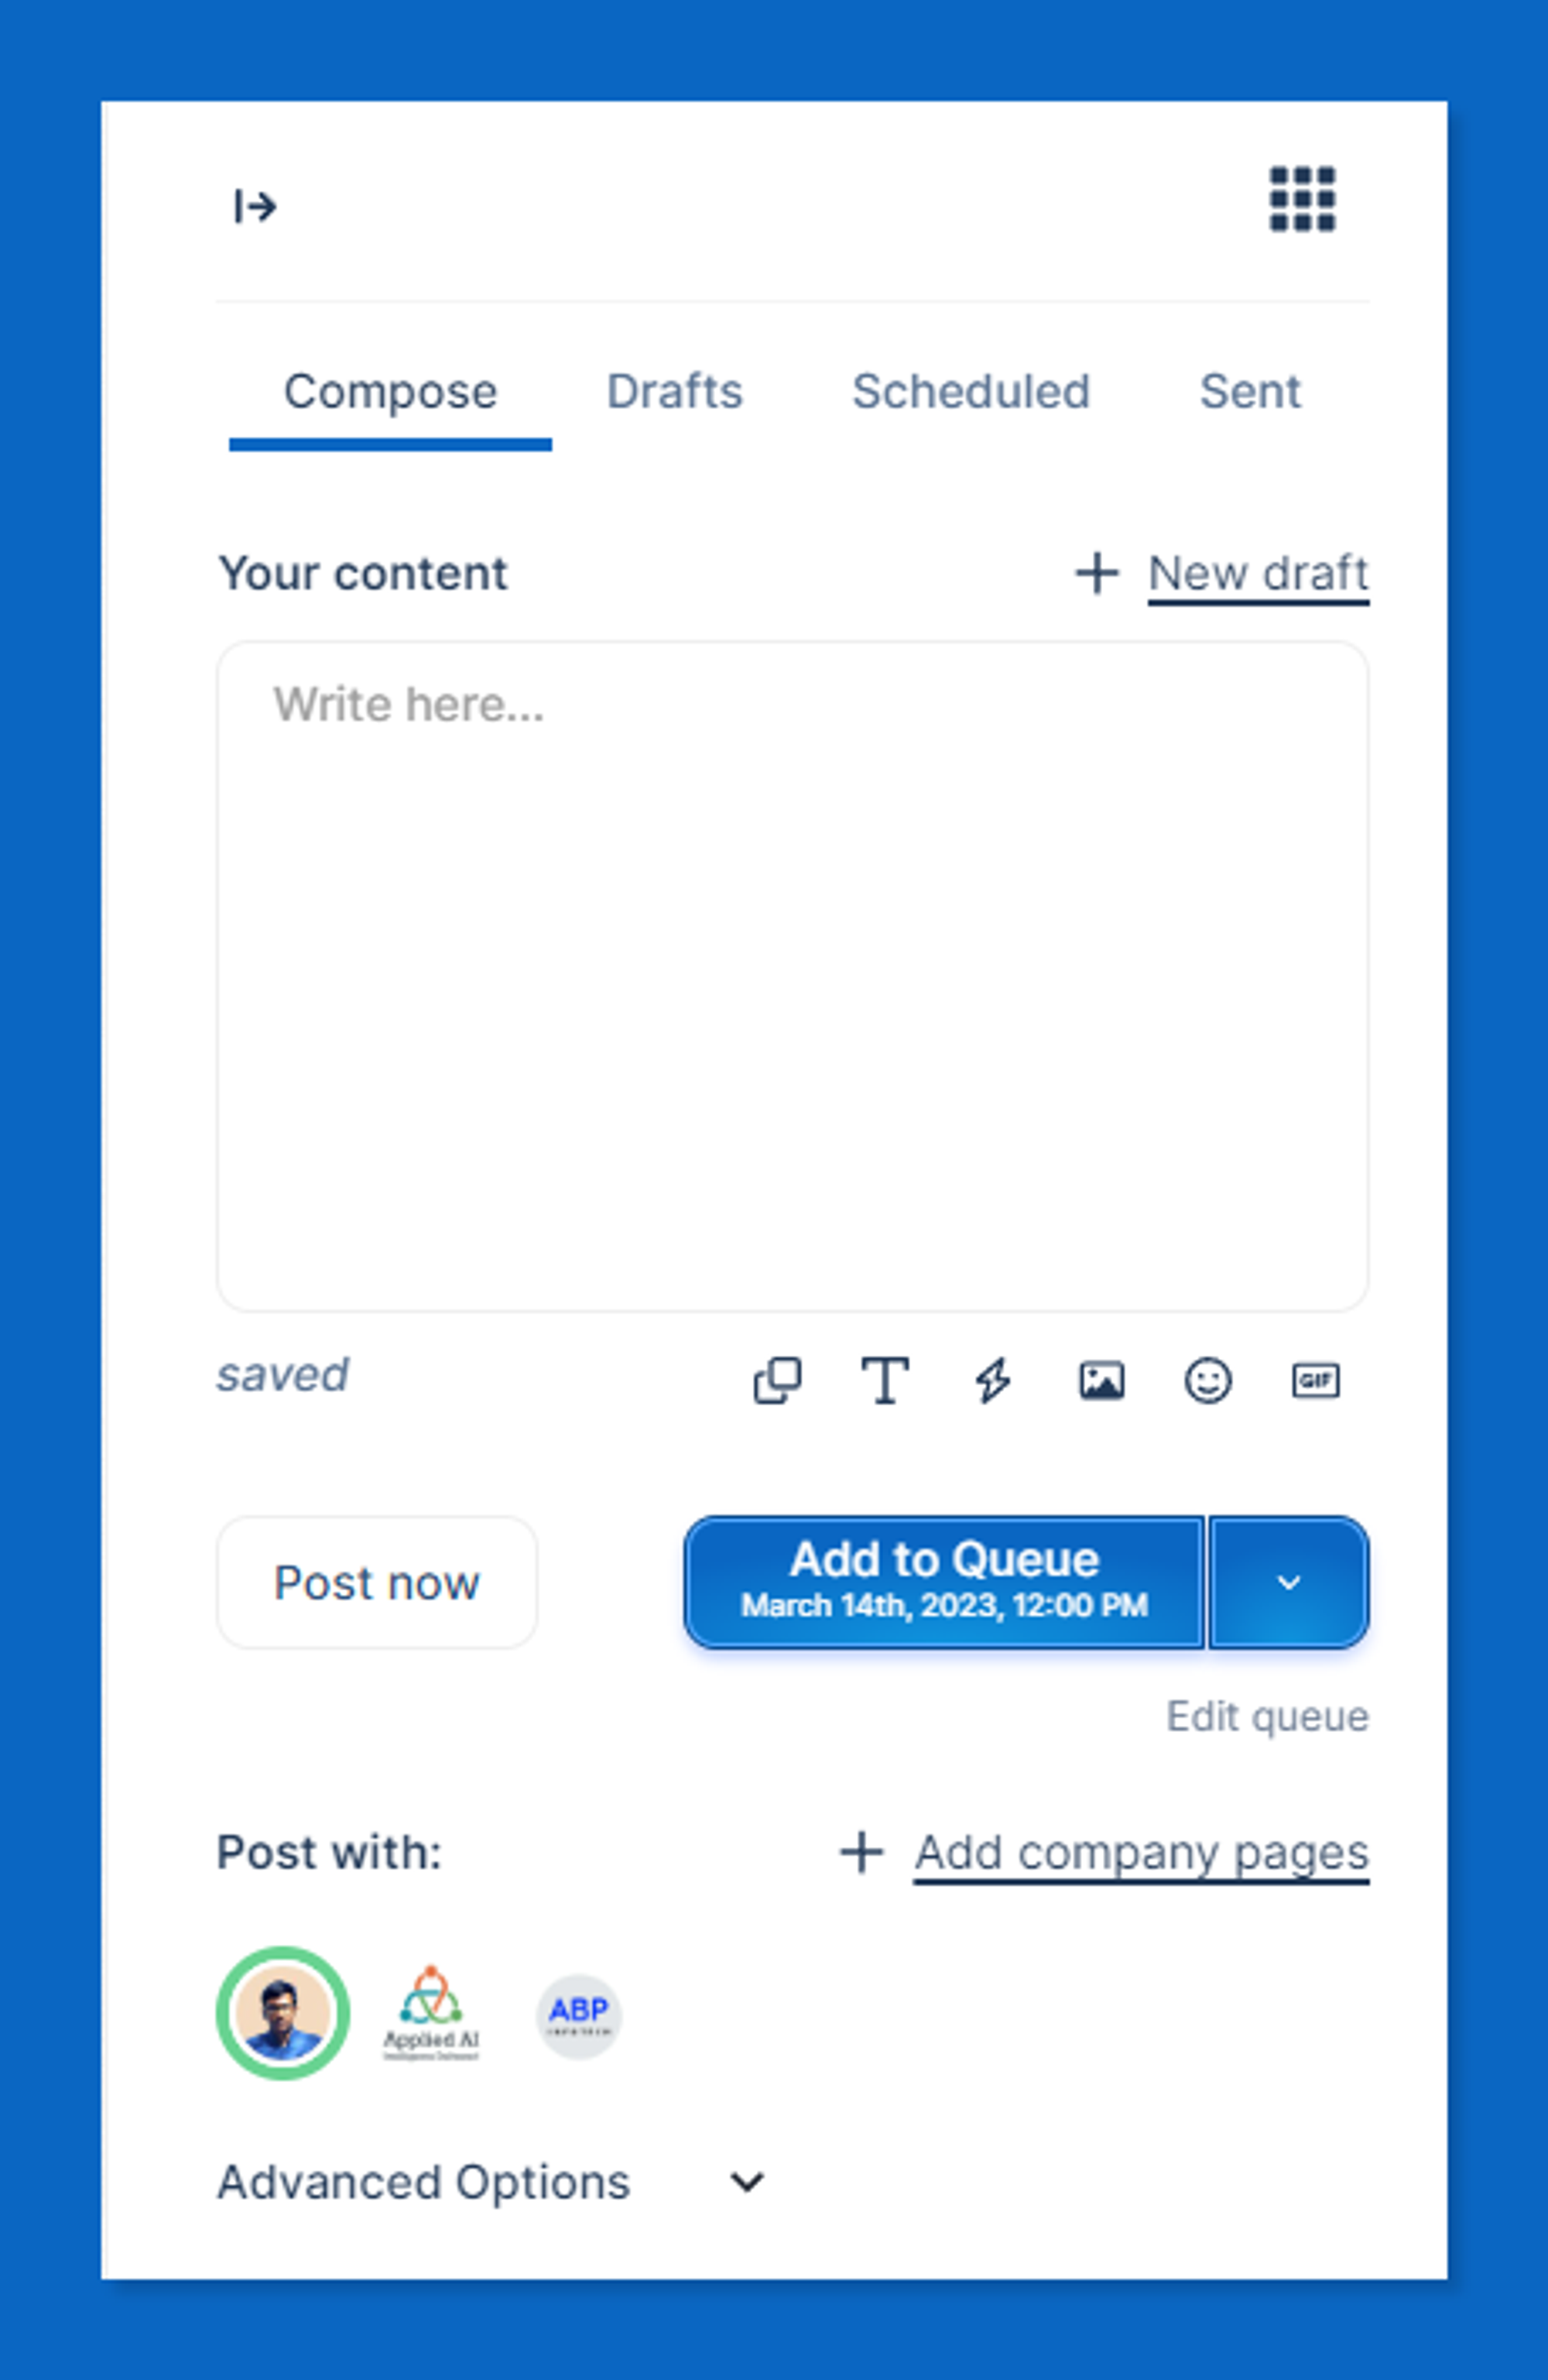
The composer is made out of multiple sections, but in this article, we’ll cover the most basic action you’ll want to do which is to write and publish a post.
Let’s start off with writing.
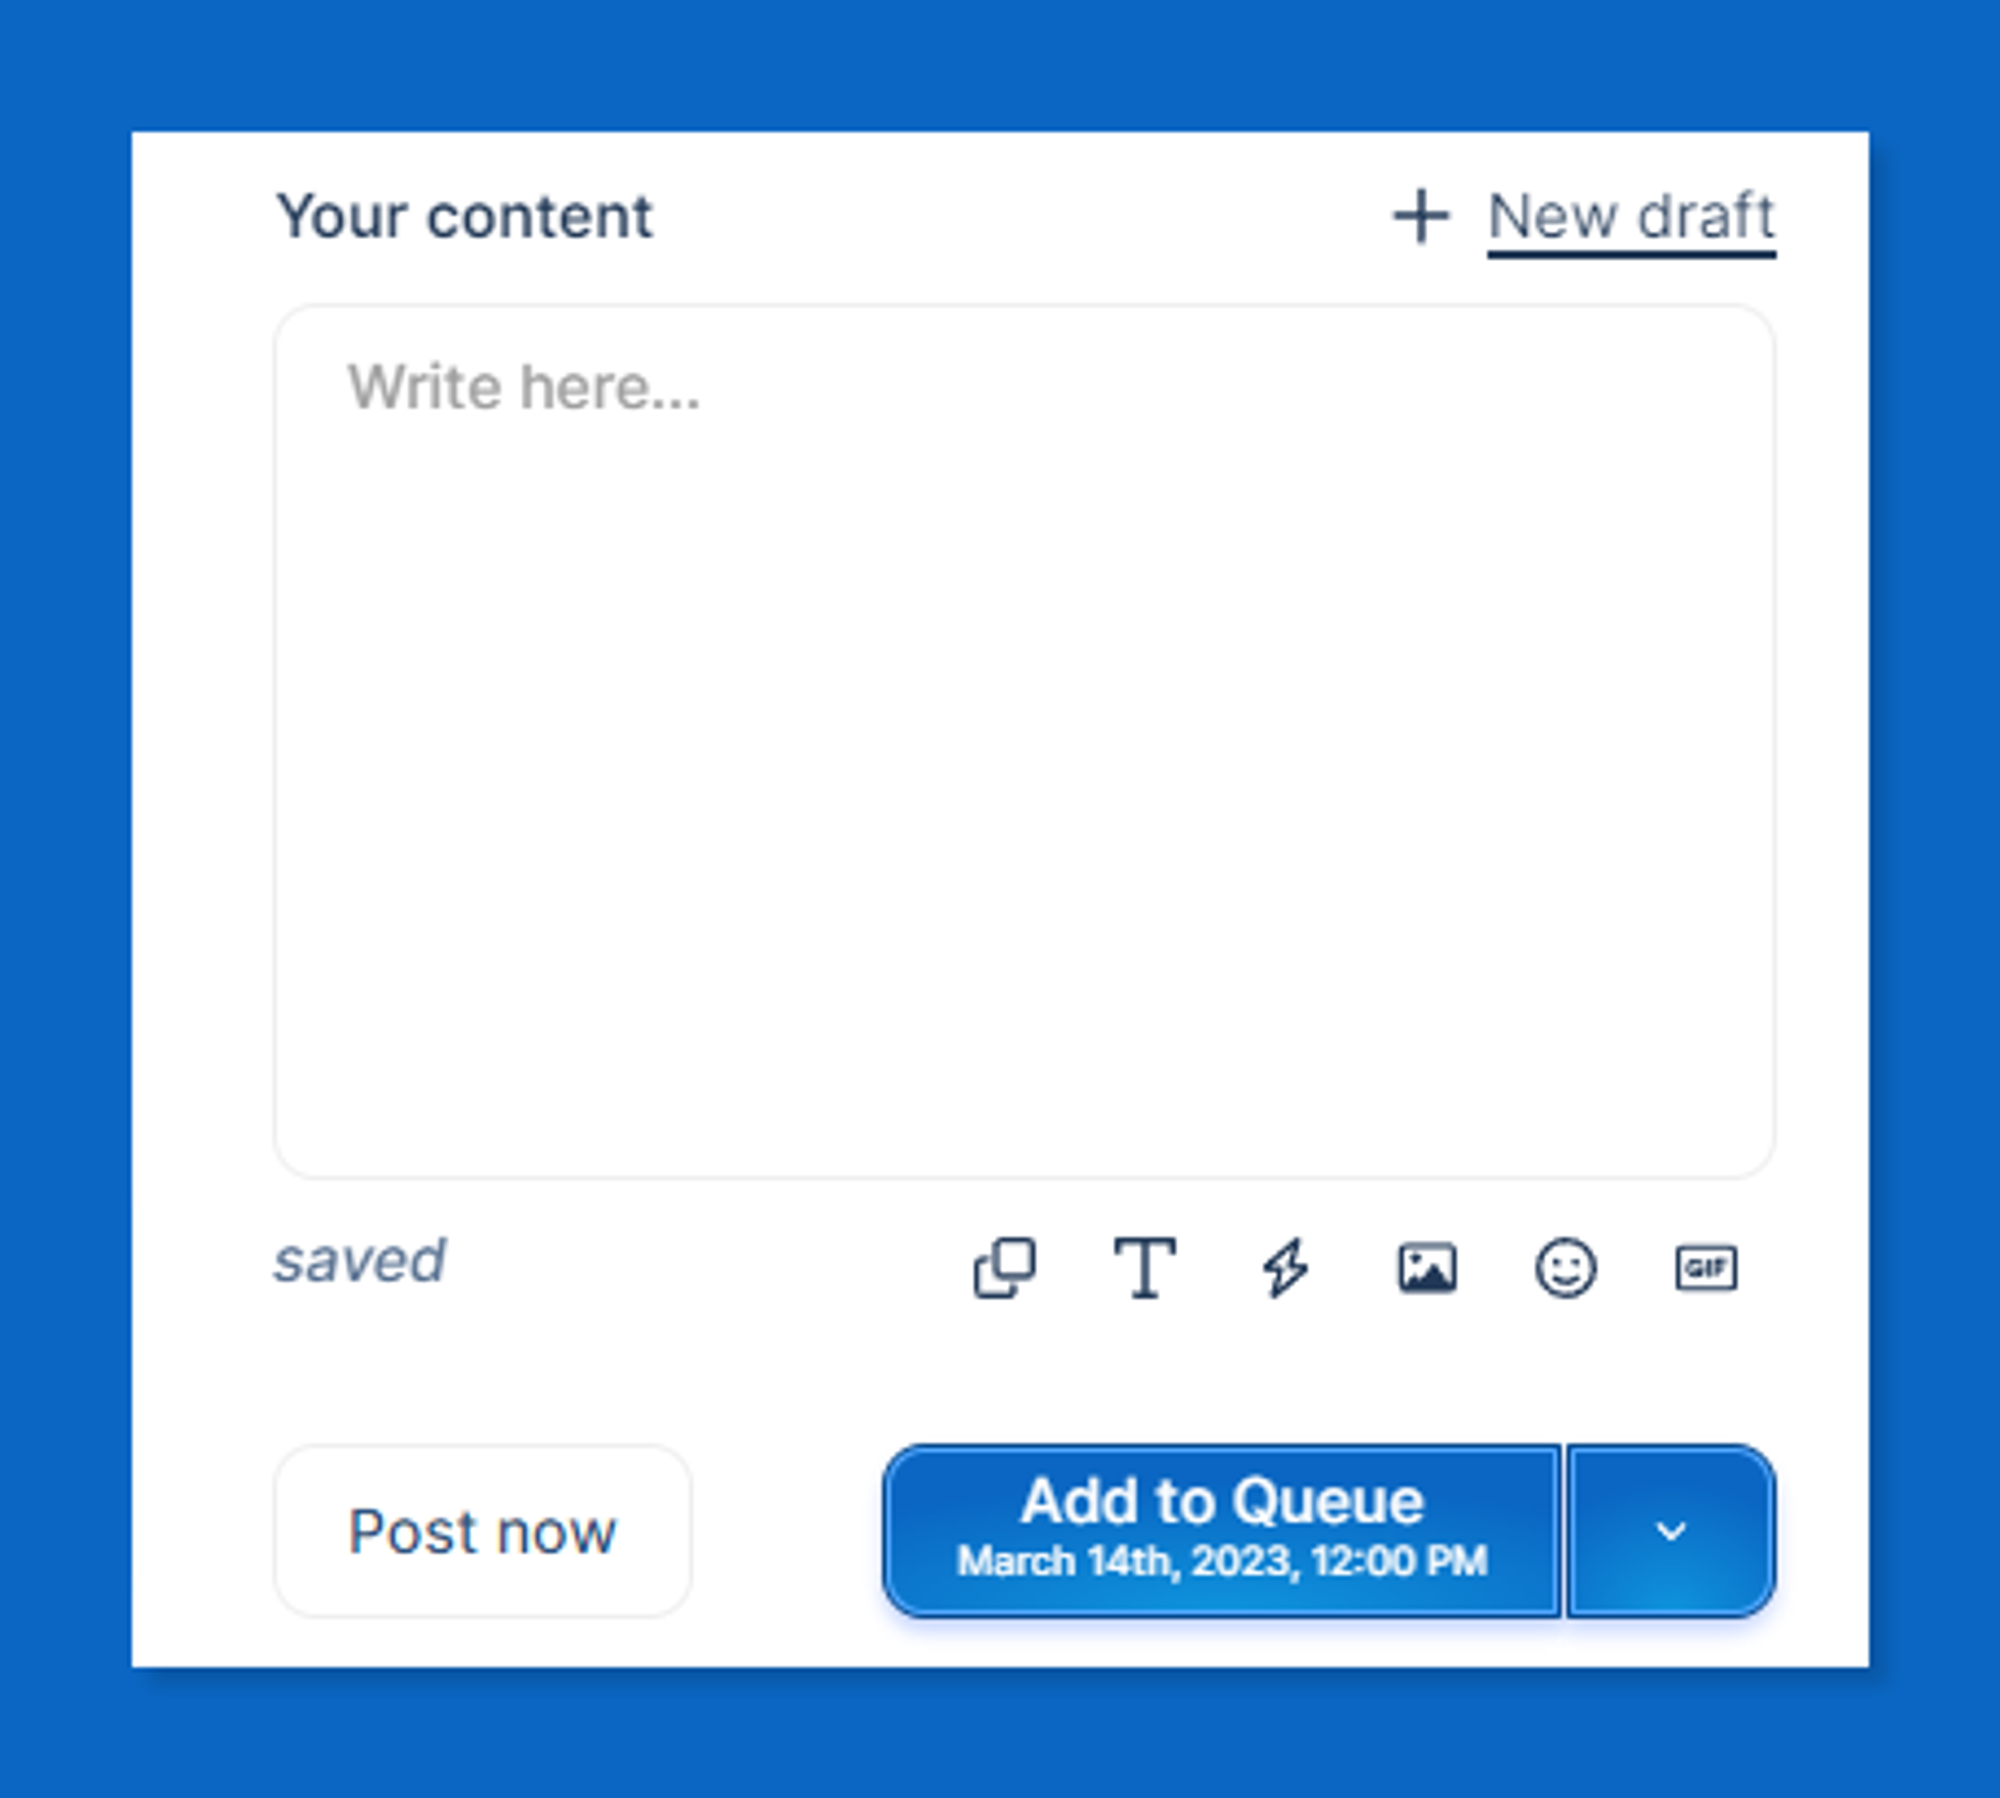
This is where you write your content. As you can see, this is very similar to just about any text input block you’ll find on the web.
At the bottom-right of the text box are all the options you can use:
- formatting the font
- using AI to continue writing your post
- adding an image or video
- adding an emoji
- adding a GIF
As soon as you start writing your post, the preview will display on the left. You can actually switch from mobile to desktop view for your preview.
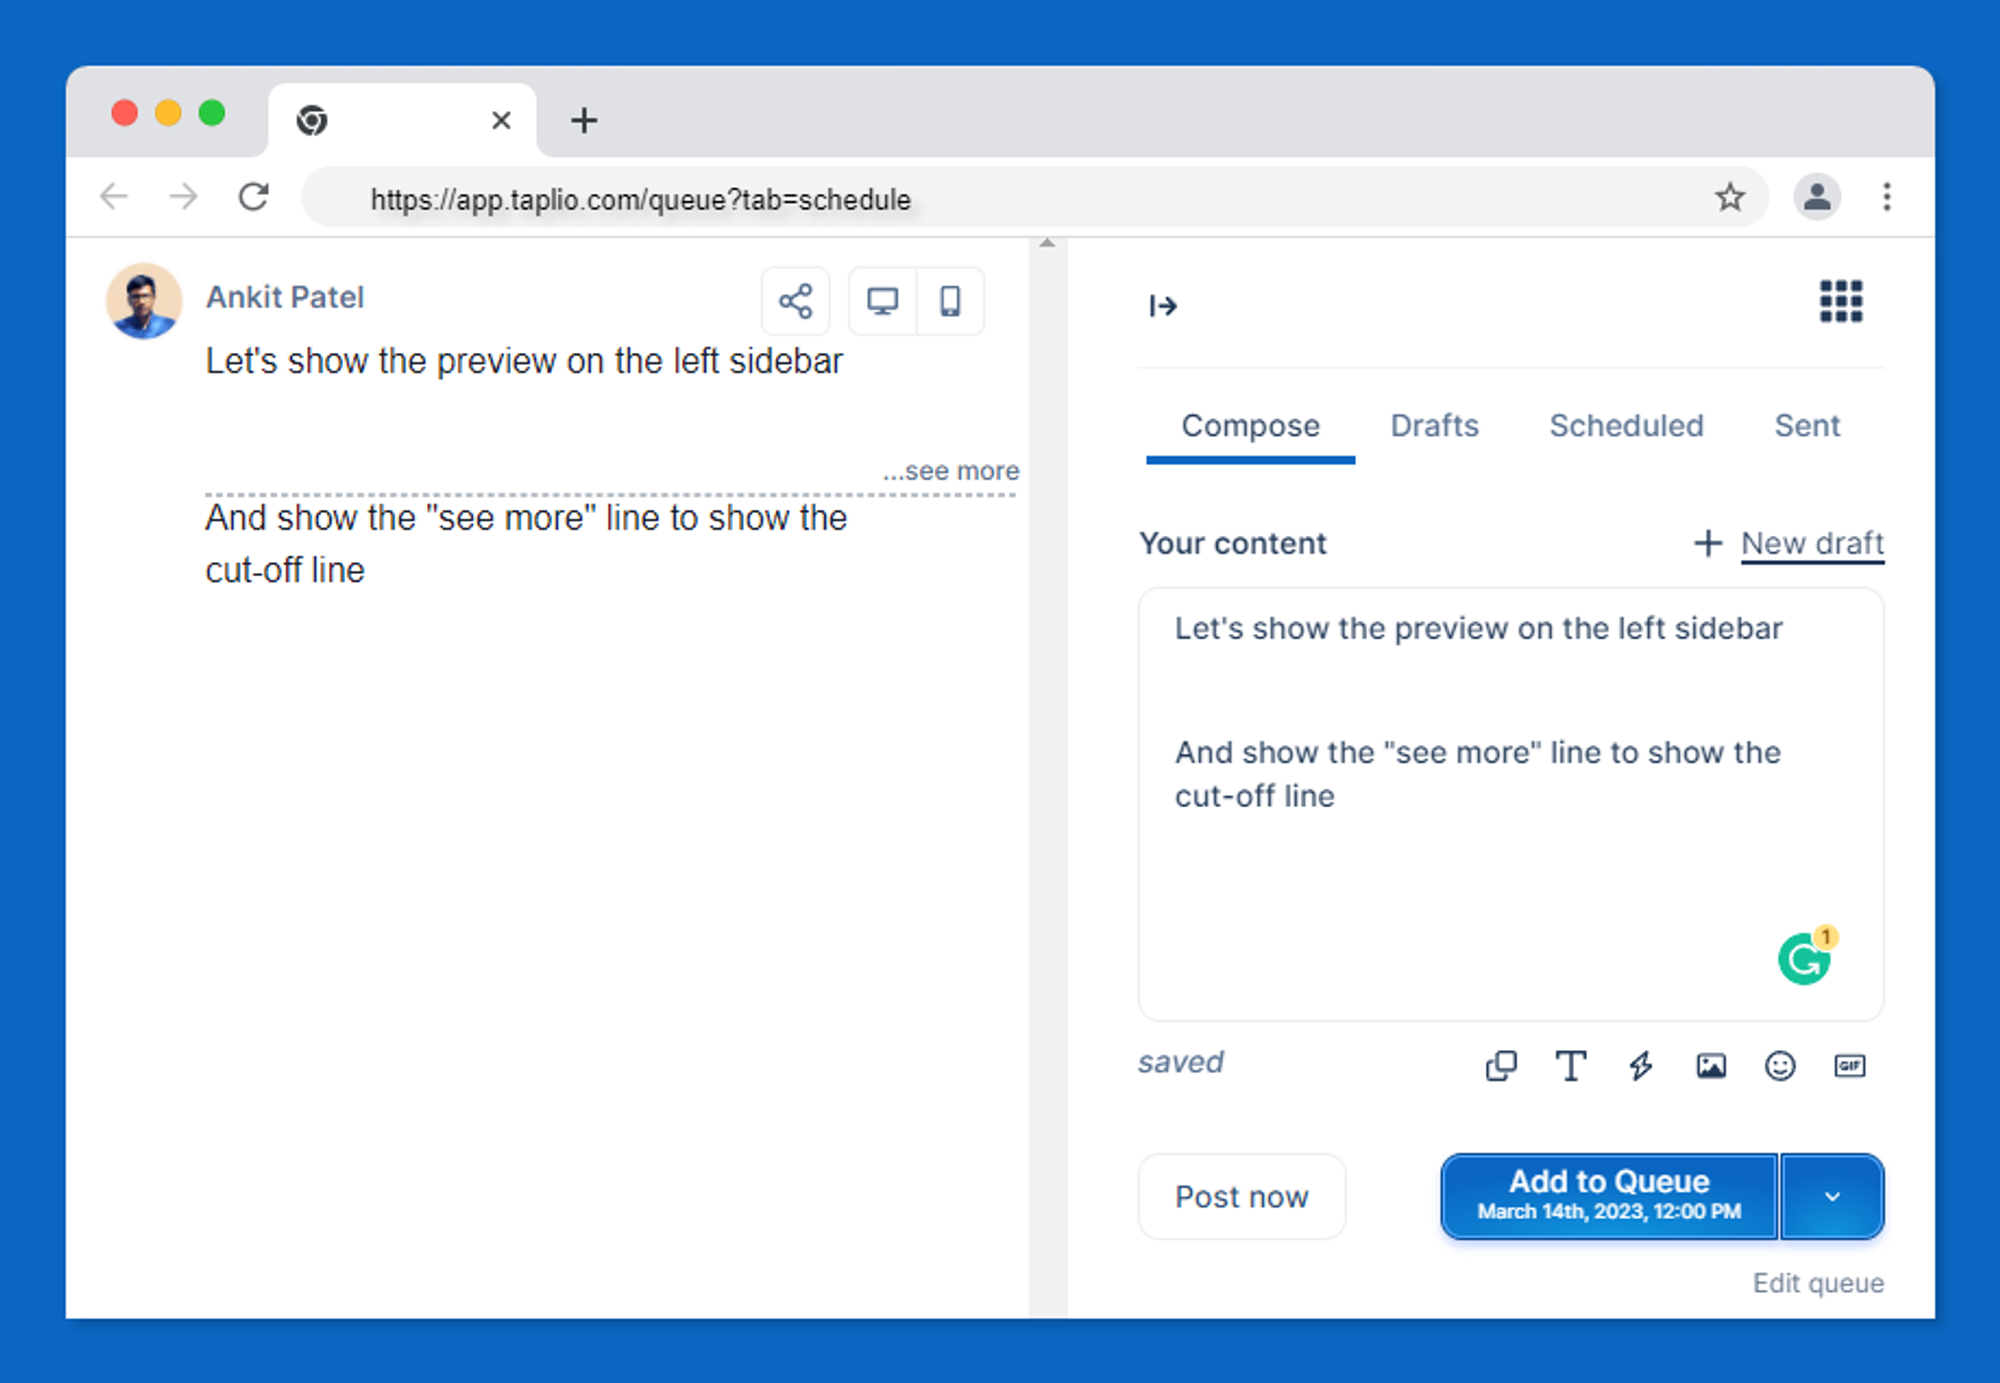
You can also see the “see more” line component, which can vary between desktop and mobile views.
Whenever you’re done writing a post, you have a few scheduling options that arise.

The most important one is the “Add to queue” which allows you to simply add your post to your schedule and not have to worry about setting a specific time for it to be published.
If you do want it to go out at a specific time though, you can open the dropdown menu to the right of the “Add to queue” button, and find other options such as “Schedule” or “Post next” if you want this post to take the next spot in the queue.
Note: if you haven’t configured your queue schedule yet, we strongly recommend you do! Simply hit the “Edit queue” text below the “Add to queue” button or head over to the My Queue section and let yourself be guided.